
04
Jun, 14DIY | Washi Tape Door Trim
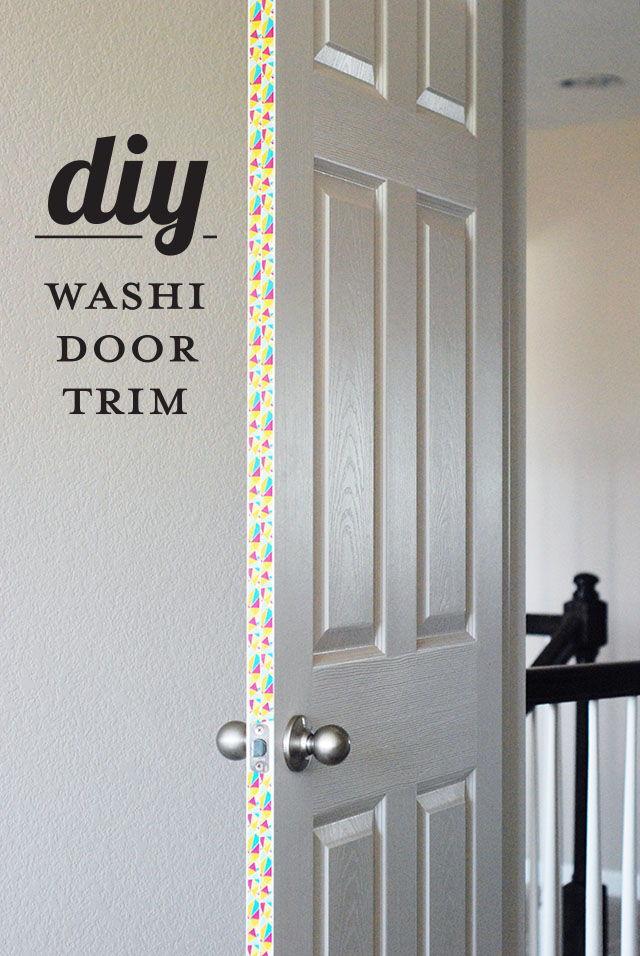
I’ve been unpacking and organizing while crafting and meeting deadlines. The other day, I took a break from printing Roblins to spruce up my door trim with some fun washi tape. I’ve been wanting to paint the trim, but wasn’t able to settle on a color yet. I thought washi tape would be the perfect temporary solution until I found the right color. But, now after seeing the finished result, I think that I’ll stick with the washi tape, because it offers so many more prints and patterns as well as the ability to change it in 5 minutes flat! And if you’re a renter – BONUS! This is a great way to add some (temporary) pizzaz to your space!
What you’ll need:
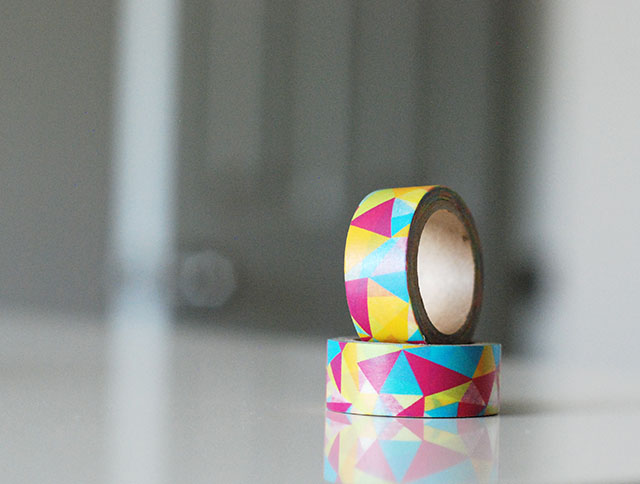
• Washi tape (I selected a 5 yd. roll for my 7 ft. door, and had some left over)
• A door
• Scissors (or you can just tear it) and an X-acto Knife (optional)
• Clear tape (to secure the ends and keep them from curling)
Seriously, that’s it!

Here’s what you’ll do:
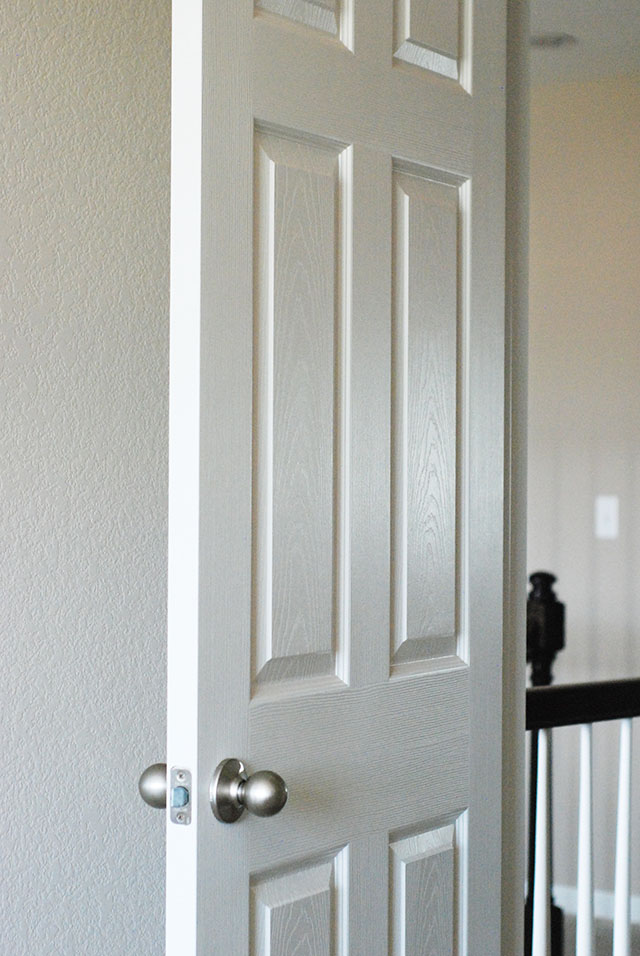
• Wipe down the door trim with a dry paper towel. I had to do this because since our house was just built, things are still a bit dusty. You’ll just want to make sure that the surface is clean for the tape to stick better. You can also use a spray duster like a multi-surface Pledge spray if you need to.
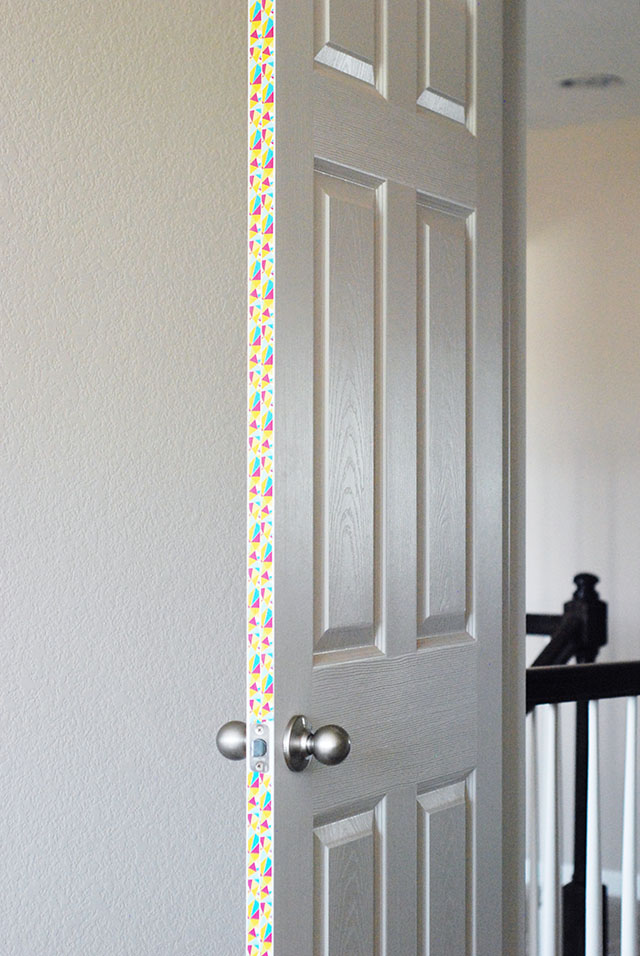
• Next, start from the top on the door and work your way down, making sure that there are no wrinkles in the tape. I chose a thin tape and then just did one strip down each side of the edge. They do make thicker washi tape, so browse around to see what fits your needs best.
• You may need an X-acto Knife to get a clean-cut around the latch.
• Once you’ve made it all the way down the door, use your scissors to cut a clean line at the bottom.
• Lastly, use a couple of small pieces of clear tape to keep the washi tape from curling at the top, bottom and near the latch, if needed.
Done and done! Happy taping.
02
Apr, 14As Seen on HGTV Canada!
Phew, yesterday was a great day for me. Not only was it my Great-Grandfather’s 101st Birthday, it was also the day that I found out that my DIY Marquee Letters were featured on HGTV Canada’s site! My husband asked me if I knew that I was #2 on HGTV Canada’s list of The 36 Ultimate DIY Projects on the Internet! I though it was an April Fool’s joke at first, but when he sent me the link, I was overcome with happiness! What an honor to be recognized and featured. Thank you HGTV for making me so happy!
There are 36 fun DIY Projects on that list, so be sure to check them all out. Also, if you want my step-by-step instructions on my DIY Marquee Letters, click here, and make your own! Thanks for stopping by – I will float off on my Cloud 9, now…
04
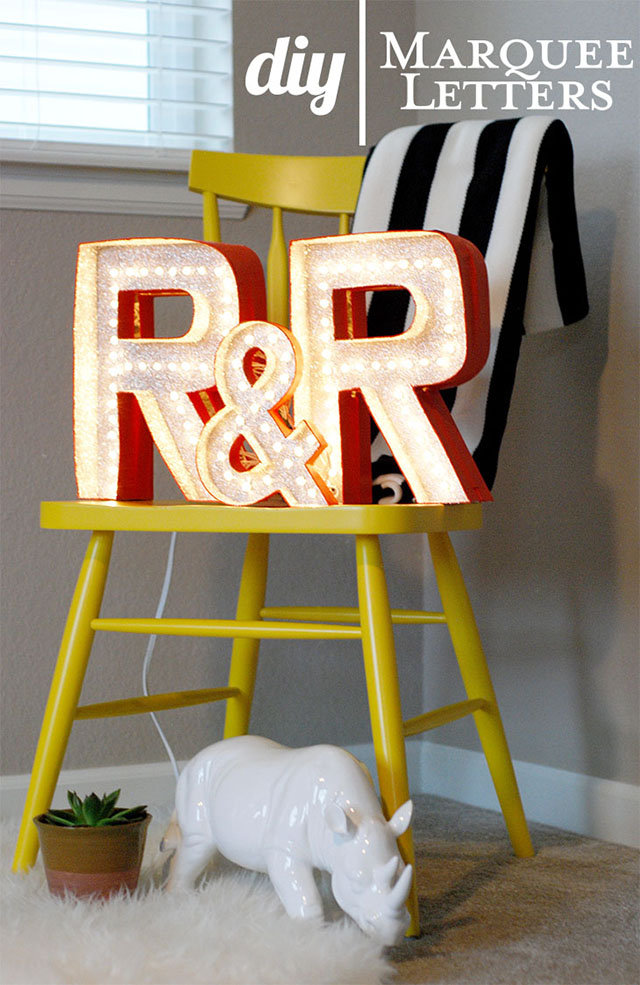
Mar, 14DIY | Marquee Letters
So, I’ve been browsing the Internet (and when I say ‘Internet” I really mean Pinterest – I mean, let’s be honest; what else is the Internet for these days, other than to support Pinterest?) …I digress. As I was saying, I was looking around for a good (no, GREAT) Marquee Letter DIY. I actually found several nice ones, but none that were quite what I was looking for. So, I decided to create some with my own touch of special and a whole lotta glitter! Of course I wanted to share how I made them, so here you go:
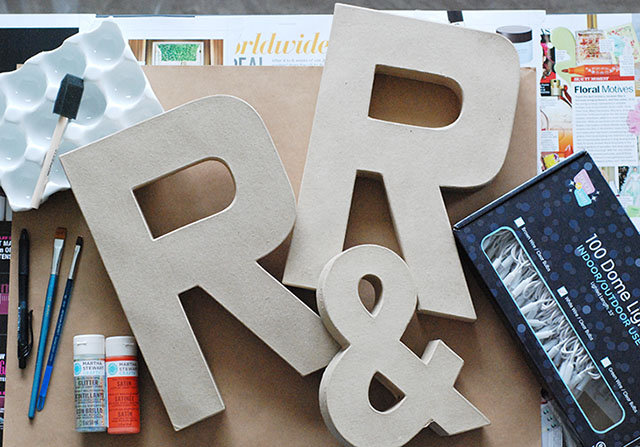
You’ll Need:
• Paper Mache Letters (they come in various sizes and can be found at JoAnn’s and Hobby Lobby)
• Acrylic Paint (I chose Martha Stewart’s Satin paint in Geranium for the burnt orange and then used white and black to make the grey)
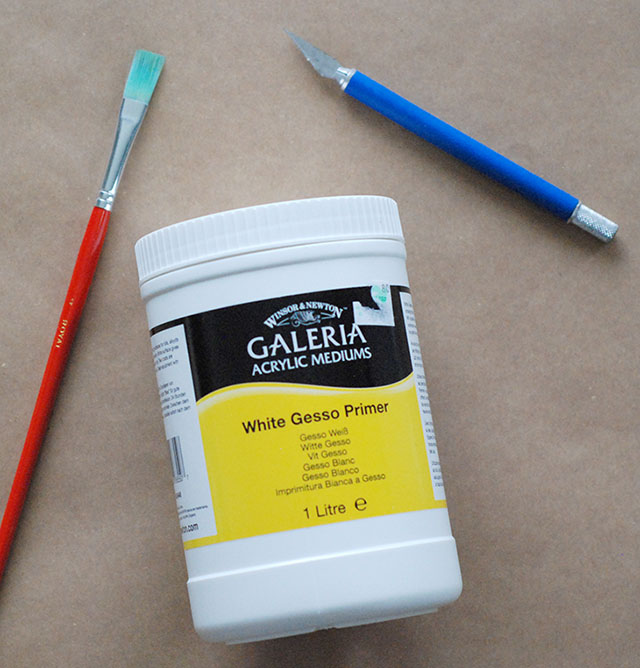
• Gesso (Canvas Primer)
• GLITTER + Mod-Podge (at first I chose Martha Stewart’s Acrylic Glitter paint in Antique, but wasn’t impressed with the overall effect, so I turned to good old-fashioned Mod-Podge and Glitter – why mess with a good thing, right?)
• X-acto Knife
• E6000 glue or hot glue gun or tape
• Paint Brushes/Sponges
• Pencil
• Ruler or tape measure
• String of lights

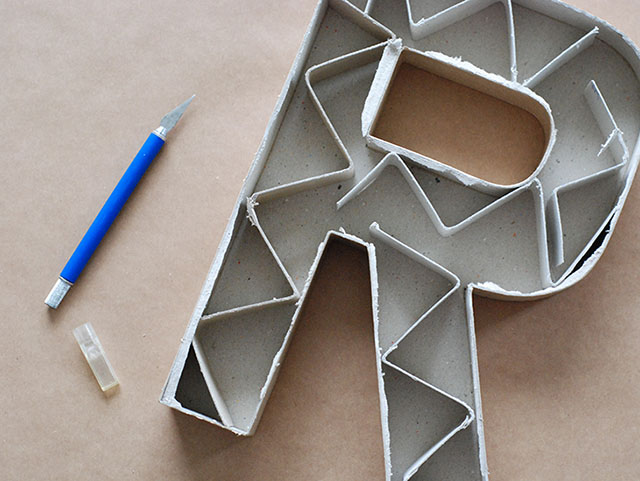

1. First, use the X-acto knife to carefully cut the front off of each paper maché letter; remove and recycle the “guts” and the top piece. Then clean up the edges with the X-acto knife.
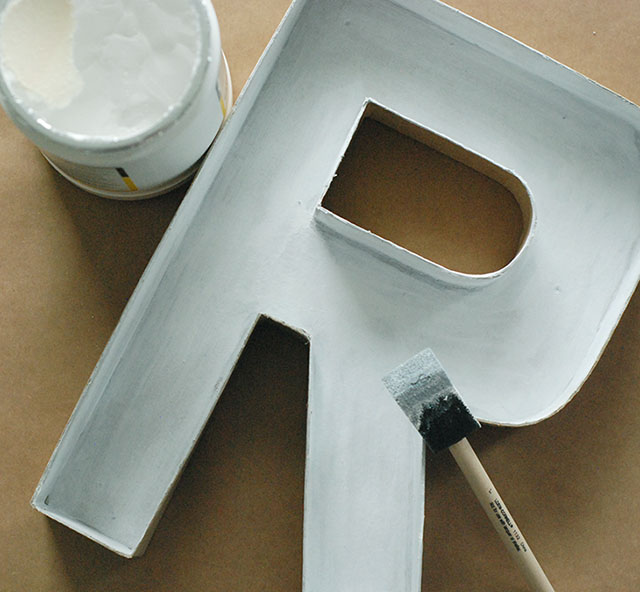
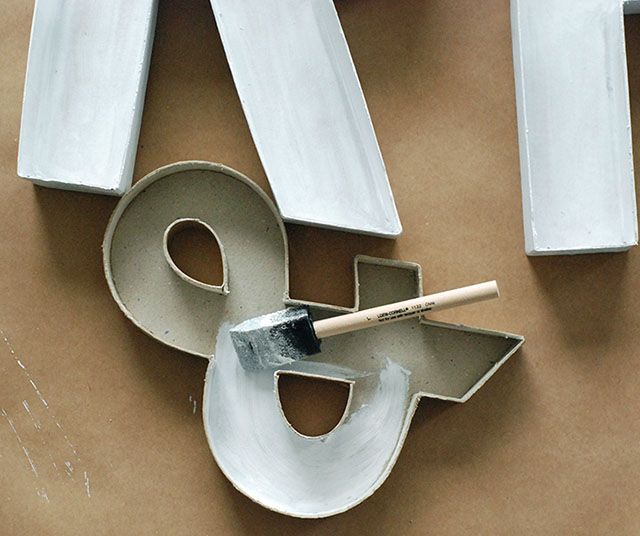
2. Next, use the sponge to paint one coat of Gesso on the inside and outside edges of each letter and let dry. I didn’t paint the back, but you’re more than welcome to.
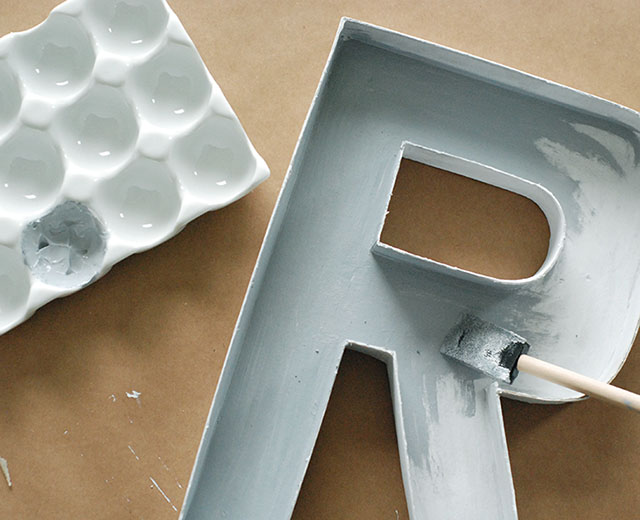
3. Once the Gesso is dry, mix up a light grey color using white acrylic paint with a small amount of black and use it to paint the inside of each letter. Once dry, follow-up with two coats of Martha Stewart’s Acrylic Glitter paint in Antique (allowing to dry between coats). NOTE: I wasn’t totally satisfied with the look of Martha Stewart’s Acrylic Glitter paint in Antique. Even with two solid coats, it didn’t give the super sparkly look that I was aiming for. So, I later went in and painted a coat of Mod-Podge and applied loose glitter. After I shook off the excess glitter, it was perfect!
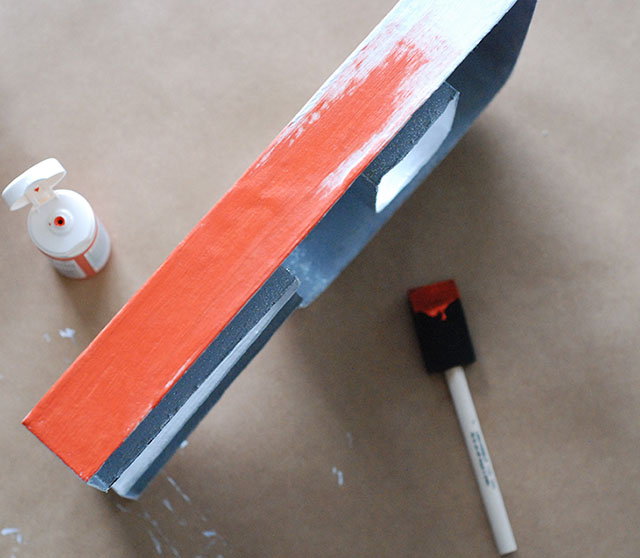
4. Then I used the sponge to paint the outside edges in Martha Stewart’s Satin Paint in Geranium. One coat was more that enough and I didn’t paint the back.

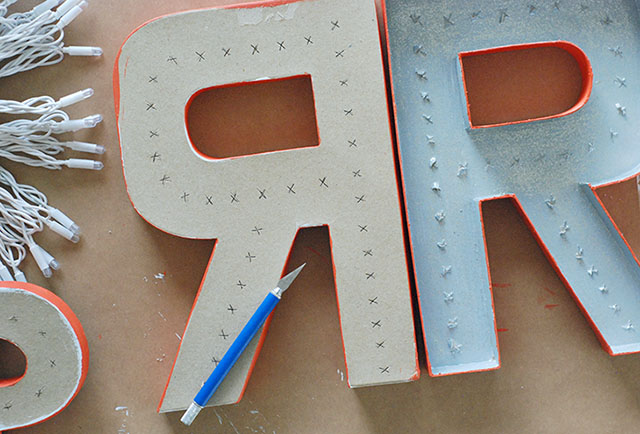
5. Measure and evenly space where each light will be inserted. Once you’ve marked each spot, use your X-acto knife to cut small “x’s” or a silent setter hole-punch to make each hole. Be careful not to make the holes too big, or the lights won’t stay in place. In fact, make each hole slightly smaller that the diameter of each light. This will insure a snug fit. NOTE: The saying measure twice and cut once applies here. I had to do this over because I got tired and tried rushing through it. The next morning everything was slightly off-center… grrrrr!

6. Be aware of where each light will go before you glue your letters together. You might have to insert the lights before gluing everything into place, depending on where they go. I placed the ampersand so that is rested on-top of both “R’s” to give some depth. You can secure the letters’ placement with E6000 glue or a hot glue gun. Both work great.
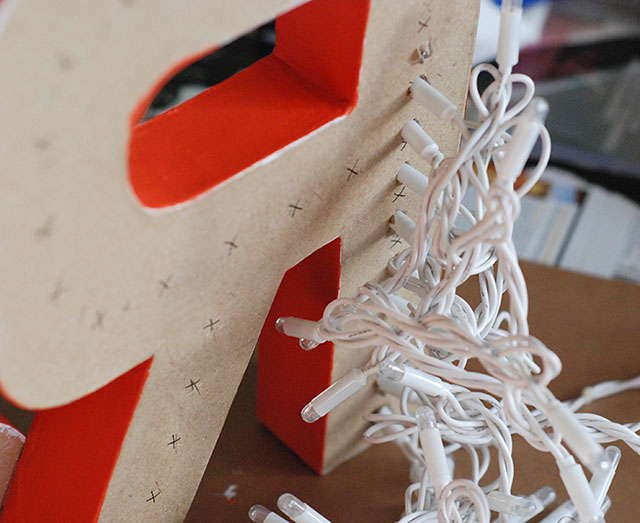
7. Lastly, insert your lights and again, make sure each one fits snug. You don’t want them slipping out. Since I messed up earlier and had to start over, I didn’t want to let the old “R’s” go to waste. So, I actually glued them onto the back of the good “R’s” to hide the protruding wires! Genius! They were already painted and good to go! You can also use some tape (and paint over the tape) to make it extra secure.

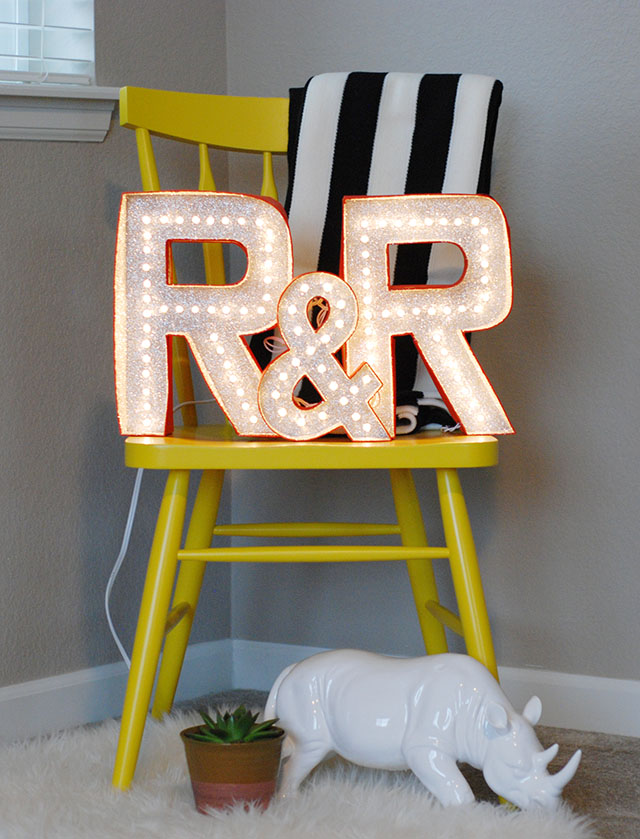
That’s it! The gesso, paint and Mod-Podge all dry pretty quickly, so it’s super easy. Let me know if you have questions. I can’t wait to see what you come up with!

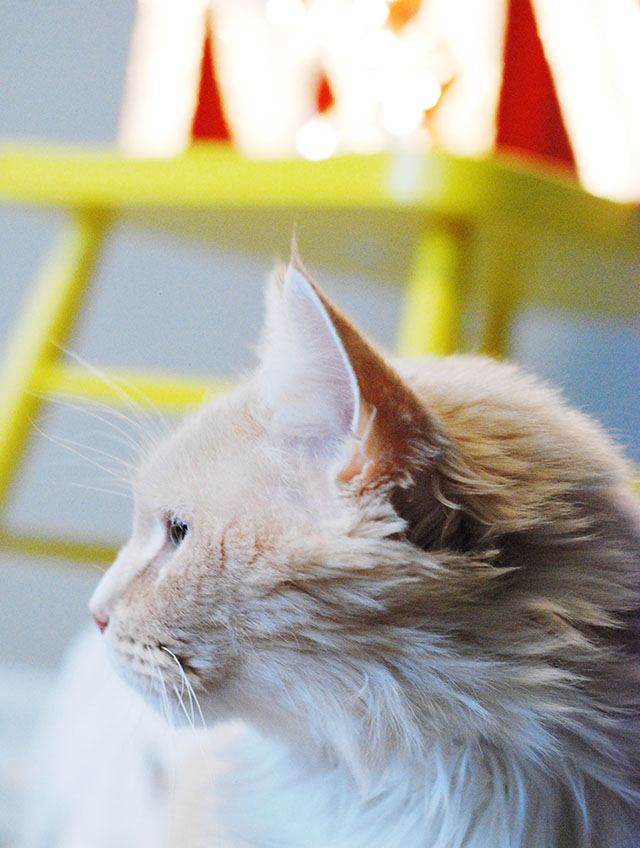

I couldn’t help myself… I just had to share these cute photos of my babies! P.S. Brutus turned 9 years old and Tucker turned 5 years old last month. Frankie will be 6 years old this month!
22
Jan, 14DIY | Faux Pearl Earrings

Valentine’s Days is almost here and what’s the one accessory that every girl needs in her arsenal for this special day?! Pearls. Pearls. Pearls! Pearl earrings to be more precise (…or Faux Pearl Earrings, rather). I do have beautiful (real) pearl earrings, and I love them so much. Lately I’ve been really into large and bold earrings. I couldn’t seem to find a large enough pair of pearl earrings anywhere, so I decided to make my own. Why not?! And when I say large, I mean Jane Jetson-style!
This DIY is suuuupppper easy; here’s what you’ll need:
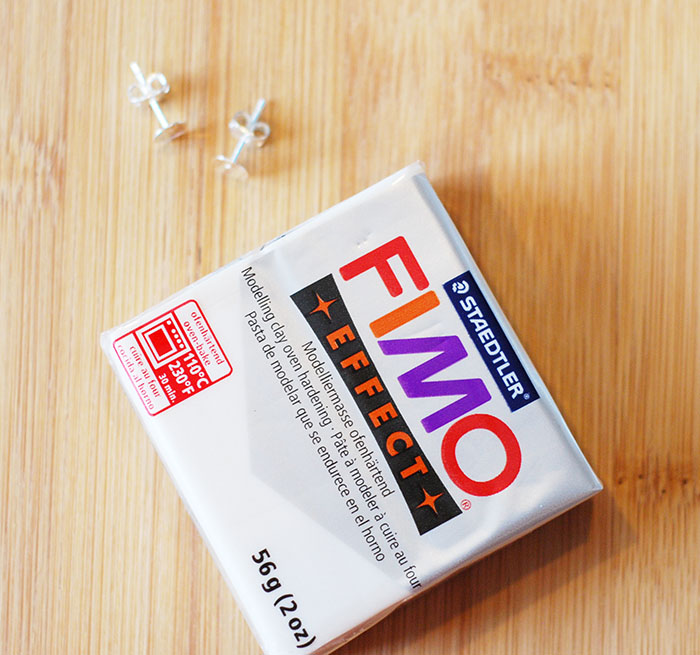
• Fimo Effect in Pearl #80 (it’s white with shimmer)
• X-acto knife or any thin knife
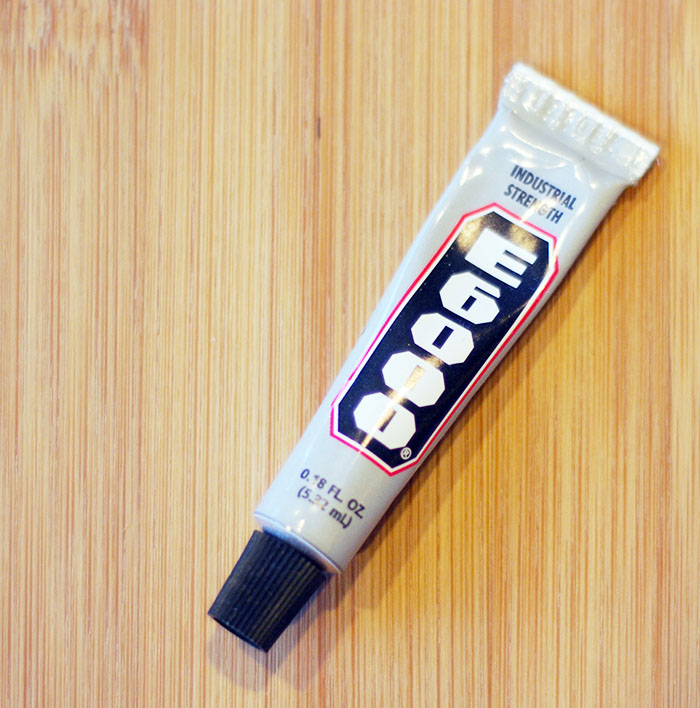
• E-6000 Glue
• Stud/post earrings with backs
• Parchment paper (optional)
• Baking dish
• Oven


The Deets:
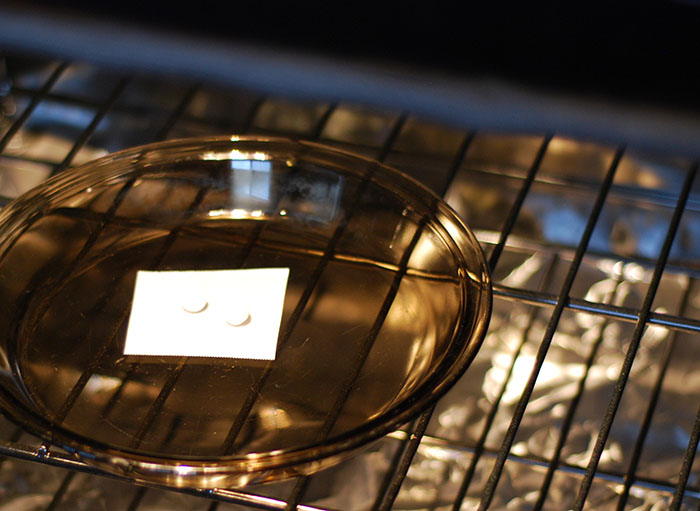
• Pre-heat your oven to 230 F/110 C.
• Place a small piece of parchment paper onto a baking dish and set aside.
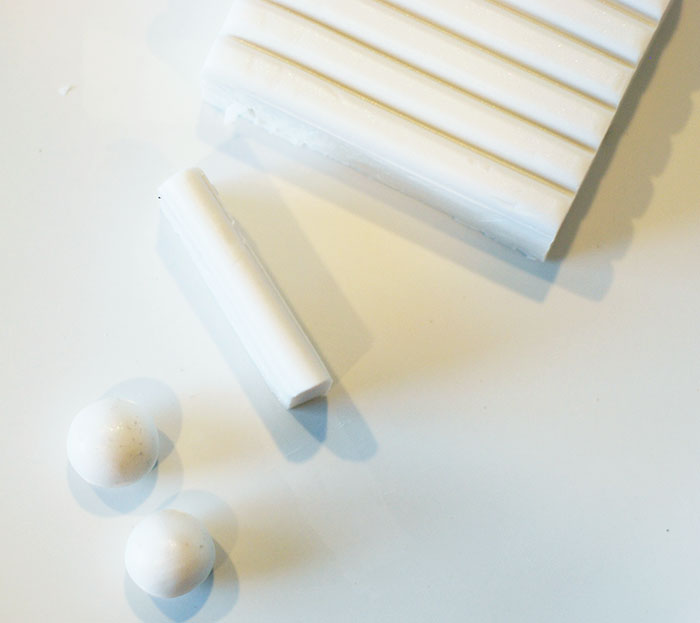
• Cut off a strip of the Fimo from the block and cut off two smaller (equal sized) pieces from that. I cut mine at about 1/2 inch each, but you can cut yours to be smaller or (dare I say…) larger.
• Roll each piece in your clean hands until each makes a smooth and wrinkle-free ball. Note: be sure to wash and dry your hands well. Then, brush off any and all lint that may be left behind from the towel; the Pearl Fimo will catch and show it!
• Bake each piece for 30 minutes then let them cool completely.
• Next, apply a small dab of E-6000 glue to each stud and gently press a faux pearl onto each one. Allow to dry for at least an hour. I dried mine over night, just to be sure.
• Wear and enjoy!

I just love the way these look and feel. It’s difficult to show how the Fimo Effect in Pearl shimmers like a pearl, but it’s sooooo pretty! Also, I love how light-weight they are to wear. We’re talking feather-light. Oh, and did I mention that they’re muuuch less expensive than a real pair?! I’ve been wearing these all week, because I love them so much!
18
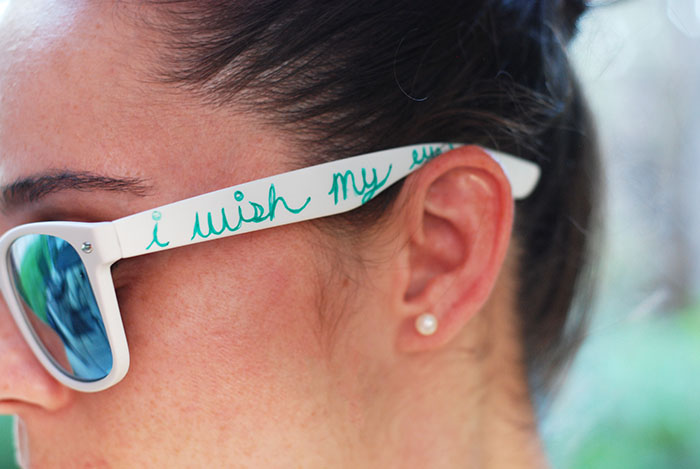
Jul, 13{DIY} Quote-worthy Sunnies
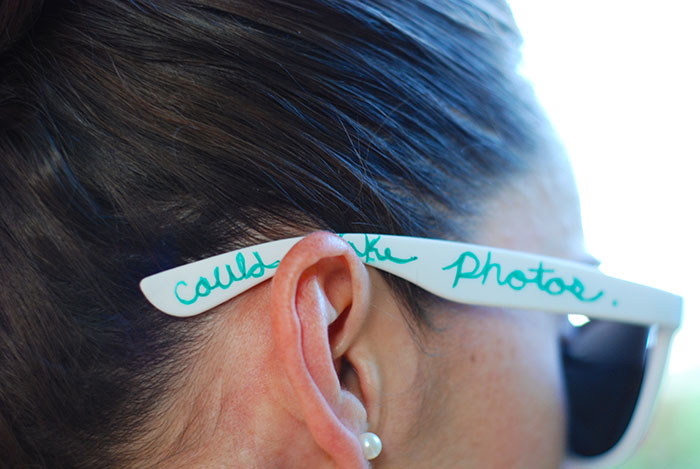
Summer is here in full swing and it’s important that you protect your precious little eyes, and that you do it with style. This DIY is super easy and inexpensive. All you need is a pair of plain white sunglasses (I like the feel of the velvety-rubber kind, but you can use the hard plastic, too), a sharpie in your favorite summer color and your favorite summer quote. That’s it! I found my glasses for $5 at Rue21, but you can find them anywhere. Try Forever21, Urban Outfitters, PacSun, Tilly’s, etc.

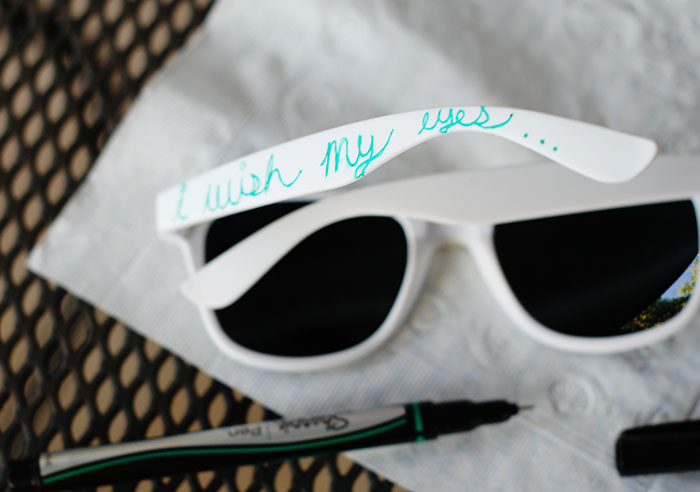
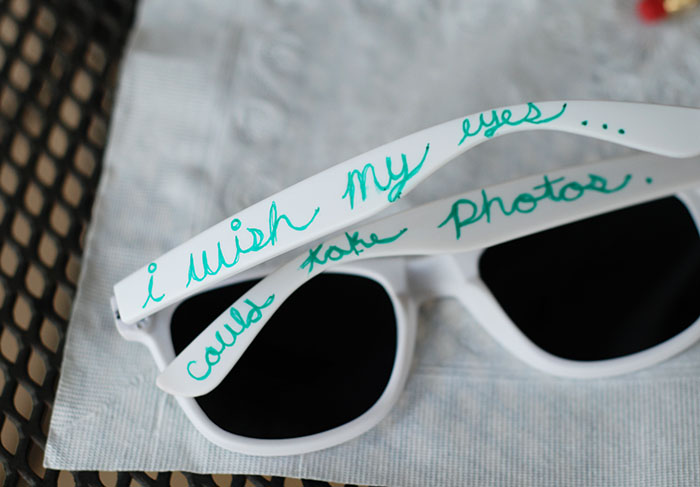
First, use a dry paper towel to wipe away any oils or dust that might be residing on your sunnies. Then, with a steady hand, start writing out your quote. I found this quote on Pinterest and fell in love with it right away. I also thought it was pretty appropriate, too. I used a fine tip green sharpie, because my lenses are green, but you can use any color. Be sure to watch your hand and the wet Sharpie. I smears super easy at first. I recommend that you let them dry for at least 30 minutes, especially if you’re using the hard plastic glasses. Once dry, wear and enjoy! That’s it!
08
Apr, 13Staging Your Home To Sell
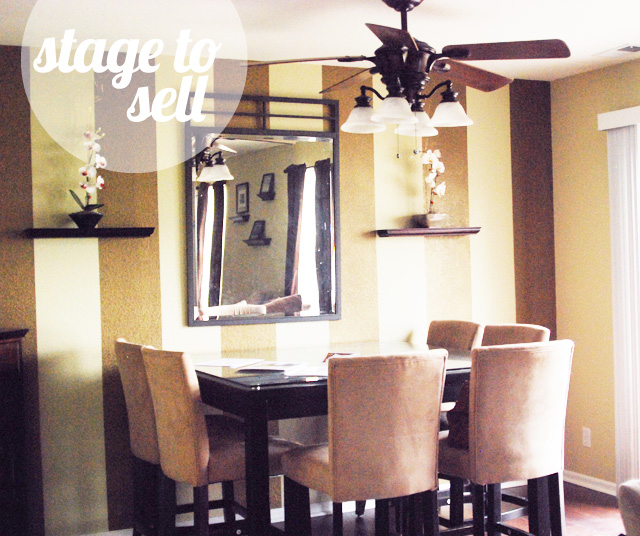
Before we put our house on the market to sell, we had to do some serious cleaning and organizing to stage it. It’s a long hard process, but a must if we want to have a chance at selling quicker and getting close to our asking price. We’ve learned a lot when it comes to staging, so we want to share a few tips to make it easier if you ever plan to sell. To start, we rented a storage unit to store all of the things that currently clutter up the house, but we will still need in our new home. We chose a climate controlled unit. It’s really cold here and we want our things to stay safe. Do some research in your area on the best rates. Once you have a unit, start packing.
We decided that for our needs, plastic storage bins were better than the traditional cardboard boxes. Although, each bin is about $6 on average (vs $4 for cardboard at the storage facility – or free if you can find them), they will last longer and keep our valuables dry and safe. Plus, they’re super easy to stack and move.
As we packed, we weeded through a few things to donate, which lightened the load a bit. Since we were in such a time crunch, we couldn’t spend too much time doing this, however. But, if you have the time, it’s worth it. We’ll end up finishing when we move and unpack.
Thankfully we didn’t have to do all of these things in our home, but we wanted to share several different things that may or may not apply to you. Who knows, a few things below might spark other ideas that relate to your home. Okay, here we go…
Front Entry
• Keep it open and clean. Remember, this is the first impression that potential buyers have, so make it shine. We had a little bench beneath our coat rack at the front door and moved it to storage, because it took up a bit of room. We instead placed a rug there for shoes as potential buyers enter. Then we thinned down the amount of coats on our coat rack to keep it simple.
Dust + Vacuum + Mop
• Potential buyers see things that you may not, because you see it everyday, you may overlook it. Dust EVERYWHERE: in corners, under things, light fixtures, ceiling fans, walls, ceilings, vents, electronics, end tables, shelves, door frames, etc. Keep it dusted at all times, because your Realtor can call for a showing at anytime. Surprise!
• Vacuum the rugs, corners, couches, under the couches (you don’t want any dust bunnies to come running out), drapes, ceiling corners, etc.
• Keep all wood floors and tile mopped and smudge-free. Don’t forget to wipe down those base-boards.
• Wash all glass windows and doors, both inside and out. Smudgy windows look pretty bad and unkept. If you have dogs with wet noses and glass doors, this will be a constant battle until you sell.
• Wipe any fingerprints from the light switches and outlets, too.
• Vacuum where the furnace and water heater are, as well. Dust bunnies tend to live there.
Personal Items
• Remove all family photos. The less personal items, the better. You want potential buyers to see themselves in that space.
• If you have pets, lint roll the furniture and remove the pet beds (unless they’re neatly tucked away), scratching posts and toys. People are fine to know that you have pets living there, but they don’t need to be reminded everywhere they look. Likewise, keep the backyard picked up and the cat box clean. The pet dishes are fine to be out, but be sure that they are clean and out-of-the-way. You don’t want people tripping. Also, if you have caged or tank animals, keep those clean (as they should be already, right?)
• Hide all of your valuables: jewelry, important documents and mail, guns, medications, and other personal items. This is for your safety.
Closets + Cabinets + Pantries
• Potential buyers open closets, cabinets and pantries to see storage possibilities. So, thin them out and only keep the items in there that you need during the time being. Put the rest in storage. Fold sheets and towels neatly and organize your food in the pantry (it does make a difference). And organize those dishes, too.
• The less you have tucked away, the more spacious it seems. Make it feel open and clean. Allow potential buyers to envision themselves living there.
• Thin out your clothes closets. Place all out-of-season clothing in storage to maintain the open feel. And don’t forget about the top shelves! Put all shoe boxes and extras in storage as well. Less is more.
• Some potential buyers may even look in your refrigerator (strange, but true), so make sure that’s organized and clean as well.
Counter Tops + Shelves
• Clear off those counter tops in the kitchen and bathrooms. Also make sure your shelves are clutter-free. Less is more.
• You know that catch-all bowl that you have on the counter? Move it. It looks messy.
Yard
• Keep the doggie land-mines picked up! No one wants to see that. Again, potential buyers don’t mind you having pets, but don’t let them see the dirty side of things.
• Whether it’s Winter or Summer, keep the yard tidy. Clear out dead grass and leaves that tend to gather in corners and under bushes. And trim back those tree and bush branches.
• Repair any loose fence posts and nail anything down that needs to be.
• Make any deck repairs that are necessary. Fix any loose rails, steps, and boards. And paint or re-stain it if necessary.
• If it’s Spring or Summer and your blooms haven’t peeked out yet, add a few planters with some Annual flowers, or put them right in the ground. This will add a touch of color and life to your yard or deck.
Smells + Odors
• Keep your home smelling fresh, but don’t overdo it with air fresheners and candles (I don’t recommend leaving candles lit for showings). Pinterest has a few good natural air freshener techniques to try.
• Let’s face it, you’re still living there between showings and you have to cook. Just try to stay away from stinky foods that may linger. You never know when the next showing will be and you don’t have time to air out the house.
Laundry Room
• Vacuum up all of those dust bunnies behind and around the washer and dryer and mop the floor.
• Be sure to organize the shelves and cabinets. Pack unused bedding, towels and laundry items in storage to keep it open and clutter-free.
• We keep our cat box in the laundry room, so we just make sure that any little litter pieces stay swept up.
• If you can help it, try not to have the washer or dryer running when a showing is scheduled. It makes the potential buyer feel like they’re intruding on your life. It’s personal.
• And if you’re like me and air-dry a lot of clothing, be sure to put them away before each showing. Again, it’s very personal and you don’t want them seeing your lacy bras now do ya?
• Keep the laundry piles low, too. It looks messy otherwise.
Garage + Crawlspace + Basement
• Chances are that you use one or more of these spaces to store some extras. Am I right? If so, clear them out. Not completely, but as much as possible. We put mostly everything into storage, except for the tool cabinet, camping gear, lawnmower and a few other small items. Don’t distract potential buyers with your stuff.
• You want potential buyers to see all of the storage possibilities that your home has to offer.
• You also want them to see that they can fit two cars in the garage.
Repairs
• Safety first, then functionality.
• Are there any repairs, both inside and out, that need to be made? What about any loose towel racks or a broken deck steps? How about any little holes in the walls or leaky pipes?
• Make sure your carpets are clean and spot-free (or as close to it as possible).
• Touch up any spots on the walls with some paint, that may need it and fix any loose railings in your stairways.
• Do you have any clogged drains, save yourself some trouble and fix them now. The Inspector will find these. (When we bought the house, we asked the previous owners to unclog the sinks before we bought it).
Other Things To Consider
• Move anything that might get broken during a showing. Think waist level or kiddo level. Women’s purses can knock a lot of things down as they turn and walk through your home. If kiddos can grab it, move it. Or if it’s something that someone can trip over, move it.
• We asked our Realtor to request that potential buyers remove their shows at the entryway (hence the rug at the from door). We are approaching rainy season and even if they are interested in buying your home, it’s still not theirs, so they may not care if they track in mud and dirt.
• Let your Realtor know about everything that made you fall in love with your home in the first place. They can share this with potential buyers. For us, it’s the huge master bedroom, complete with a reading nook. We also have a huge open landing/loft upstairs between all of the bedrooms, which makes it feel so open. The thing that I will miss the most is that our backyard opens up to a Greenbelt and you can watch the Fourth of July Fireworks from the yard! It’s so nice not to have to drive to a venue and fight parking on that special day. Our family and friends benefit from it as well.
After you’ve done all of these things, you might just want to stay! We love our home so much, but we’ve completely outgrown it. It’s time to allow another family to enjoy this lovely space. I hope that the tips are helpful to you when you plan to stage your home to sell. If you have any other tips, please share in the comments below. Good luck!
02
Mar, 13Our Cozy Little Nook
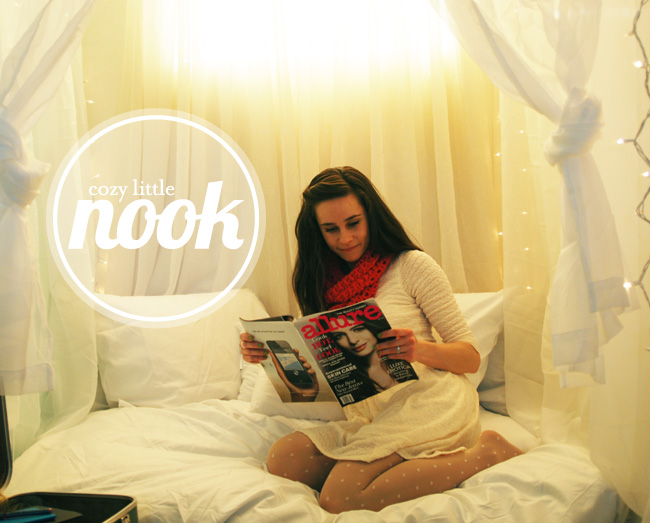
Wow, it’s been cold here in Colorado, and because of that I’ve been keeping busy with home projects. I recently transformed our bedroom nook into a cozy and peaceful reading and work area. This space was meant for something like this, because it’s tucked away in the corner – the perfect escape. I used to use this space as my sewing area, but decided to switch things up a bit so that my husband can enjoy the space, too. I’ve been planning this for some time now and the cold snap just gave me the boost I needed to follow through.
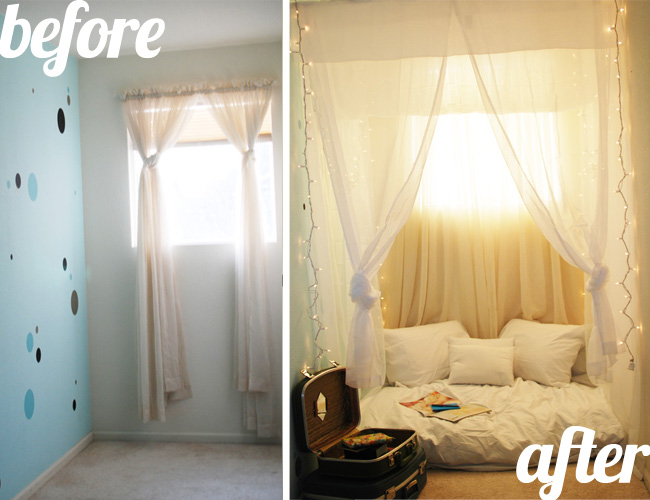
For Christmas, Ron gave me a giant bean bag and it fits perfectly in our new space. Then I purchased 4 sets of sheer curtains, white sheets, two tension rods and some sparkly lights to finish it off. With the bean bag and everything here, it cost about $200 to complete. I plan on making tiny pillowcases, for the tiny pillows, out of scrap fabric that I have lying around. I’ll post a little {diy} soon. Oooo… and maybe a scrap quilt, too!
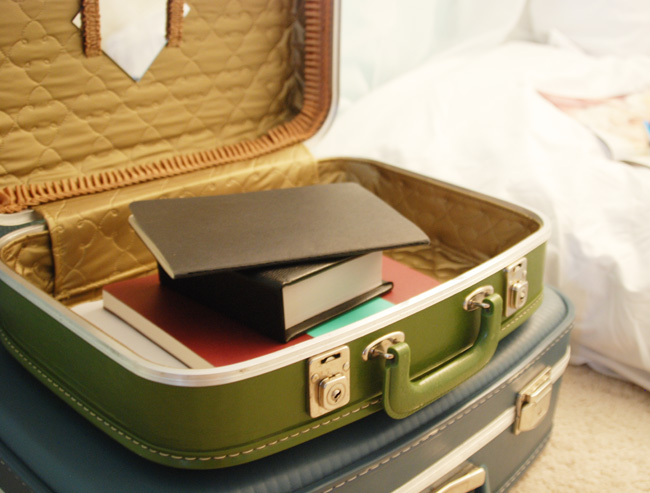
Oh! A couple of weekends ago the hubby and I found that little green suitcase at an antique shop near Denver for $14! It’s in excellent condition and just needed a quick wipe down. Well, it actually didn’t even need to be wiped down, but I’m a bit of a germ and dirt freak, so I did it anyway. It holds all of my current idea books, sketchbooks and pens perfectly. The blue case below is full to the brim with magazines that I need to catchup on, sheesh!
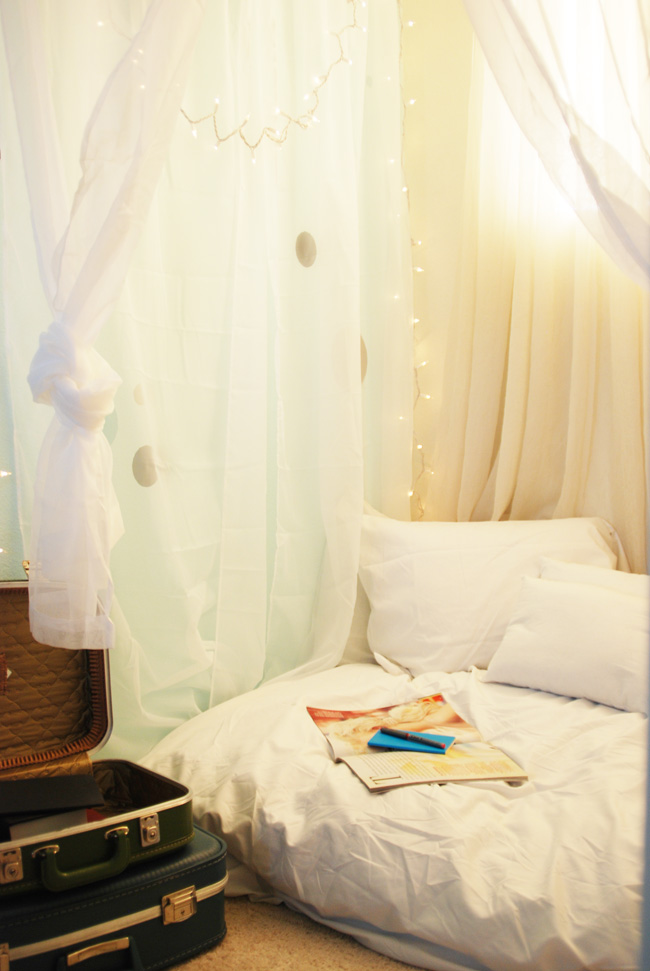
I’m really happy how this space turned out and it was so easy! If you’ve been in the mood to create a fun fort or magical corner in your home, I highly recommend it!
29
Nov, 12{diy} magical garland

I’ve been wanting to make one of these for a while and I’m so happy that I did. Not only is it super easy to make this magical garland, but it’s incredibly inexpensive, too. All I did was buy a string of lights for $2.88 (LED lights work best) and used scrap fabric that I had lying around, that’s it! It took an evening to make this, so I pre-cut a bundle of three different fabrics, ranging from white to cream – very subtle. I chose to cut my strips 1.5″W x 6″L, but you can make them longer if you’d like. I think any shorter may be difficult to tie, unless you cut them thinner. Say .5″ or 1″ wide.

Then, I sat down with a few per-recorded shows and got to tying. No double knots, just a simple single knot and that’s it!


Every string of lights may be slightly different, but to give you an idea of how many strips to cut, I tied about 4-6 strips between each light. So, count how many spaces are between each bulb and multiply by 5. I used approximately 500 strips on my 22 ft. strand (with 100 spaces between the bulbs). I had a few extra strips, so I went ahead and tied them down the little tail that leads to the plug. I stopped a few inches short of the actual plug, because it makes me nervous to have fabric so close to the outlet. Also, as with all lights, I highly recommend that you don’t leave these plugged in unattended, just in case.

It’s so easy and you can make it while watching a movie or two! I hope you get around to making one of these this year, because if you’re like me and occasionally enjoy a mindless project, while still feeling like you’ve accomplished something, this is for you. It would also make a really fun and inexpensive gift. Happy making!
16
Oct, 12{diy} chalkboard name tags

True story, I woke up the other morning, bright and early, with this DIY on my mind. Wild, huh?! I’m not sure if I dreamt it, or if I thought of it as I was waking up, but I immediately wrote it in my ideabook so that I could share it with you. And boy am I excited to share!

I don’t use them a ton, but I find the need for a name tag once in a while. I don’t think that it would hurt to have a name tag while I work the craft shows. My mom and I do a few a year, so these might come in really handy. And, if not, then I wouldn’t really need a good reason to wear such a cute name tag anyway… ha!
For this project you will need the following supplies:
Mini Chalkboards | These can be found at your local craft store, such as JoAnn’s.
Colored Chalkboard Paint | I chose pink, but you can choose another color or to keep it black.
Brooch Pins | These can be found at your local craft store in the jewelry section.
Acrylic Paint | This is optional. I wanted to paint the wooden frame.
Hot Glue Gun + Glue
Chalkboard Marker or Chalk
Paint Brush

First you cut off the little string that comes attached to the mini chalkboard and tape off the frame so that you can paint the chalkboard. Once that’s completely dry, tape off the chalkboard and paint your frame. Then set aside to dry. (It may take more than one coat of chalkboard paint for full coverage. I let mine dry for an hour between each coat.)

Next, hot glue the brooch pin on the back of the mini chalkboard, near the top-center. This will ensure that your name tag doesn’t tip forward and hang down. You want all to read it after all.

Lastly, write your beautiful name on it and call it done!
My favorite part of this {diy} is that its reusable and eco-friendly!!! Enjoy!
15
Oct, 12sneak peek at my next {diy}

Happy Monday! This past weekend was full of rest and a bit of Halloween shopping. What did you do? I wanted to let you know that I’ll have the {diy} that I’ve been talking about up tomorrow. I’m waiting for a few things to dry so that I can add the finishing touches. I really can’t wait to share it! Until then, have a great evening.

