30
Sep, 12September Favorites
Wow! I can’t believe that September came and went. What better way to start off a new month than with a birthday… mine to be exact (Oct.1)! October is my favorite month for so many reasons and I have a lot in store for you. There will be more {studio sunday} features, a giveaway, DIYs, and more… just you wait and see.
But first, lets look back on a few of my favorite posts from September, shall we.
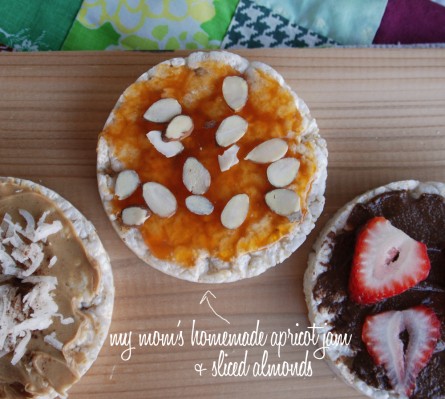
Here’s an easy and healthy snack 3 ways!
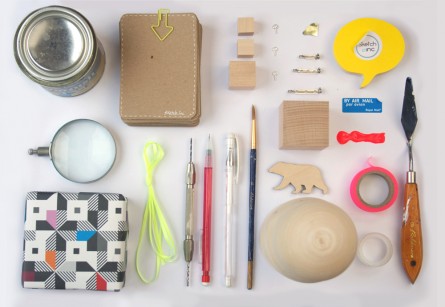
A super fun {studio sunday} with Becky at Sketch.inc
A bright {studio sunday} with the one and only Twinkie Chan!
A sweet {studio sunday} with Miss Kate Gabrielle!
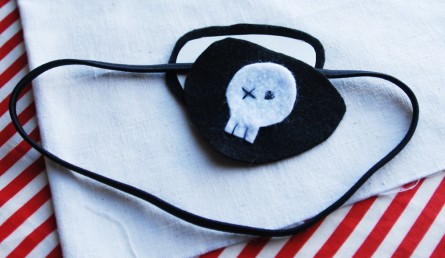
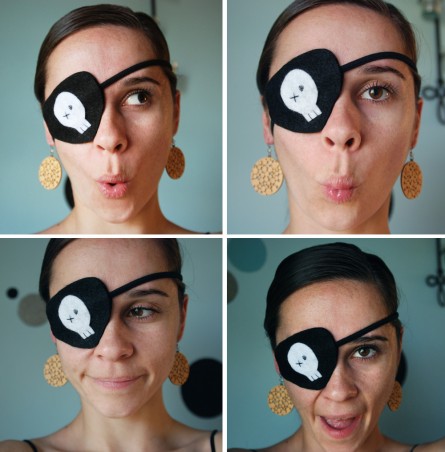
An easy Pirate Eye Patch {diy} just in time for Halloween
And a super simple way to dress up and tank
I hope you enjoyed these as much as I did and I look forward to sharing more with you in October! ♥R
26
Sep, 12{diy} a simple touch of lace
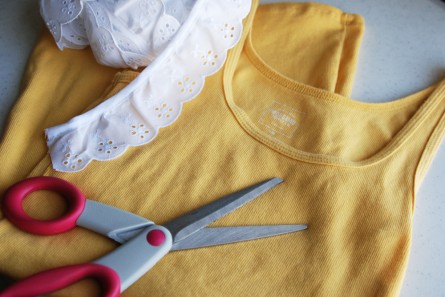
Here’s a quick and easy way to cutesie up a simple tank with some soft lace. All you do is line up the blunt edge of the lace with the collar and use your sewing machine to stitch along the edge. It’s so easy, I didn’t even pin it before, I just held it together as I went along… seriously! Tips: Stretch lace would make this a bit easier, but if you pull the tank neckline tight (stretch it a bit as you feed it through the sewing machine) as you sew with regular lace, it will give you some slack.
This is perfect for a casual date night and it saves some money! Enjoy! ♥R
25
Sep, 12{diy} pirate eye patch
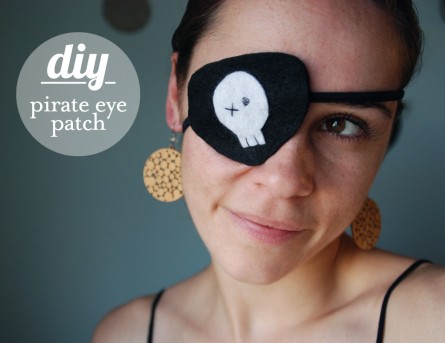
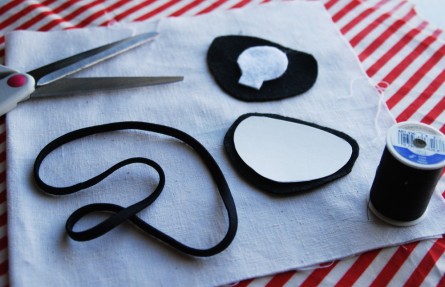
Pirate costumes are always a hit for Halloween and today I’m going to show you how to make an easy pirate eye patch! It’s so simple that all you’ll need is a thin black stretch headband, black and white felt scraps, black thread, thin cardboard (from a cereal box) and a hot glue gun.
If you’re making this for an adult, the headband should fit nicely, but if your making it for a kiddo, either buy the smaller headbands, or you can snip a bit off and re-sew with a zig-zag stitch until you get the perfect fit.
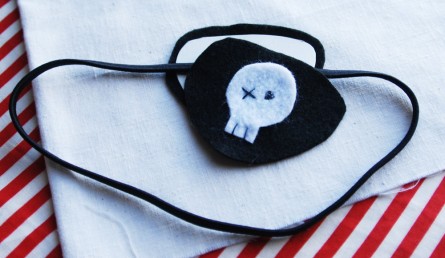
First draw an eye patch shape onto your cardboard and cut it out. Then use that as a template, but be sure to trace it onto the felt a little larger than the cardboard. Cut out two black felt patches and hot glue the cardboard to the inside of one of these pieces (this is to keep it sturdy and not cave in). Next, cut out a mini skull and hot glue it to the other black piece and embroider the face. Finally, glue the inside of the blank black felt piece (the one with the cardboard attached) to the headband, then layer and glue the piece with the skull. So the headband should be sandwiched in between the two black felt pieces. That’s it! Happy making. ♥R
12
Sep, 12{diy} sunglass cozy
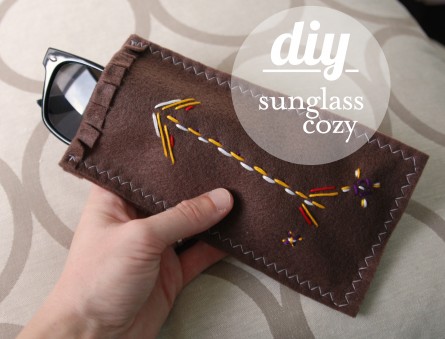
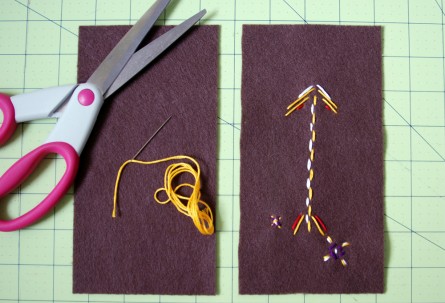
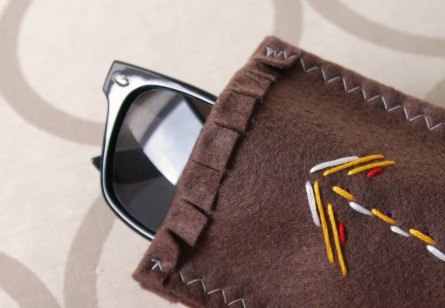
As you can already tell, I’m in full-fledged Fall mode. Here’s a cute and easy way to keep your glasses safe and warm this season. All you’ll need is a standard (8.5” x 11”) piece of felt (I like EcoFi felt), scissors, a sewing machine, some embroidery thread, iron on interfacing or scrap fabric and hot glue + gun (optional).
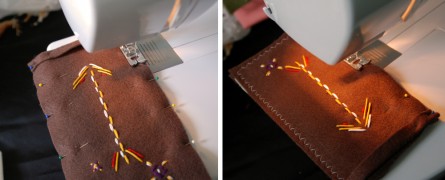
First, you measure your glasses and add about 2” to the width and 2″ to the length. Mine was 4″ x 7″ finished. Then cut out your pieces (you’ll need two). Next, embroider whatever design that you’d like onto one or both of the pieces. Then, either iron on a small piece of interfacing or sew in some scrape fabric to cover the threads on the inside, so that your glasses don’t snag on them when you pull them in and out.
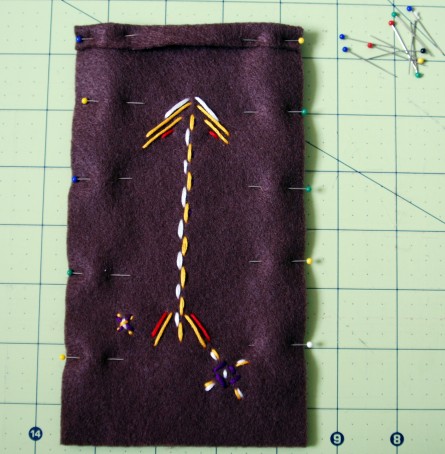
Next, place your two pieces together (right sides out) and at one of the short ends, fold about ½” down on each side and pin.
You’ll sew around both long sides and one short side. I chose a zig-zag stitch. Note: Leave the short side with the folded piece open (this is where you will slide your glasses in and out).
Finally, you snip parts of the folded piece to create a fringed effect and add a few dots of hot glue to hold the fringe down. That’s it! Now you have a fun Fall cozy for your glasses. ♥R
05
Sep, 12{diy} rice cakes 3 ways
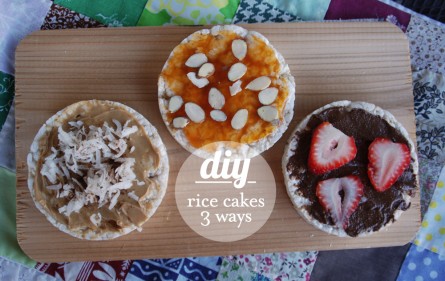
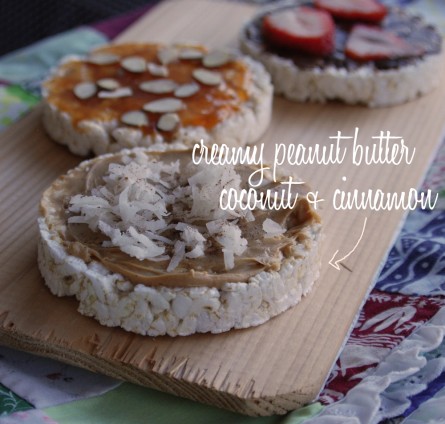
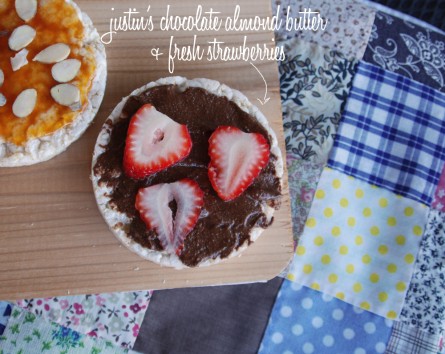
Today I thought I’d share an easy way to mix up your healthy snacking by sharing rice cakes 3 ways. Rice cakes can be described as “cardboard-like” or “flavorless,” but they don’t have to be. With a few simple ingredients you can transform your boring rice cakes into a healthy snack that you look forward to! The possibilities are endless, so play around with what you have in the pantry and I bet you’ll be surprised with what you can come up with. For these 3 variations, I used lightly salted rices cakes, but you can use whatever flavor you’d like. Each cake is only about 35 cal, so depending on your choice in toppings, you can fill up on little calories.
15
Aug, 12{diy} easy sequins belt
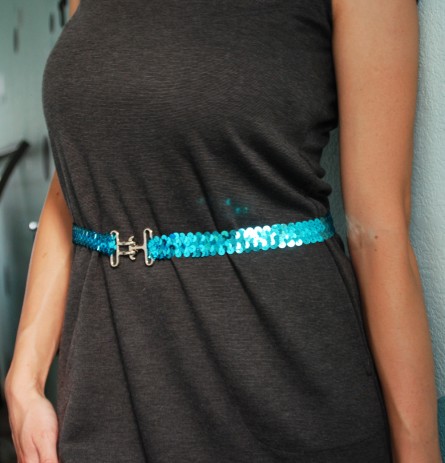
This will probably be the easiest belt you’ll ever make! Seriously.
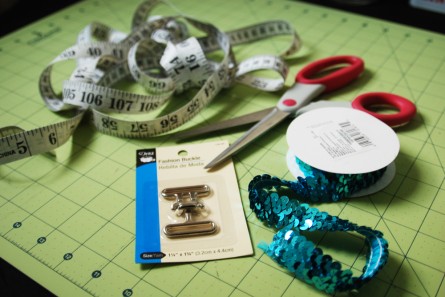
All you’ll need are the following materials:
1. Tape Measure
2. Scissors
3. Belt Clasp
4. Stretch sequins (you can buy this by the spool or you can measure your waist and get it cut at the craft store)
5. Needle and thread or a sewing machine
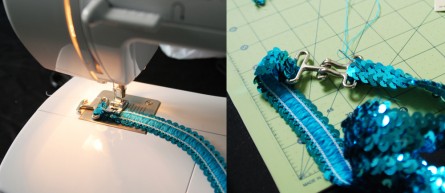
First, measure your waist (I like to wear mine at the small of my waist), subtract one inch and cut. That’s right, subtract an inch, not add, because this stretch sequins can really stretch and you don’t want it to be loose. You don’t want it to be too tight either. Then you simply sew one end of each buckle to each end of the sequins strip that you just cut. You can sew this with your sewing machine, but I prefer to hand stitch it. It’s easier to hide the stitch lines. If you do use your sewing machine, be sure that you’re using a strong needle and wear safety glasses if possible. I’ve broken a needle doing this. That’s it! Easy, isn’t it?! Happy making. ♥R
10
Jul, 12{diy} jam butter
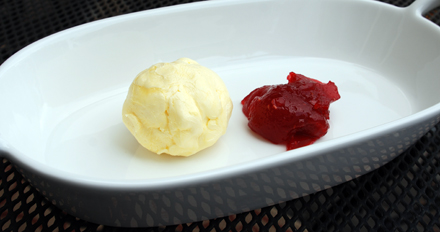
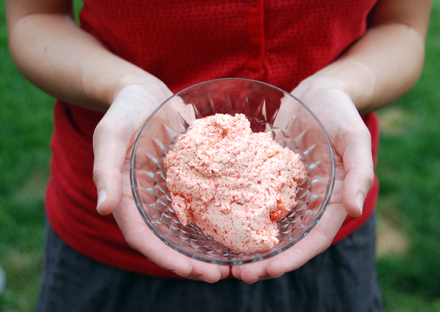
I love magazines and Country Living has to be my current favorite. They always share so many lovely recipes and crafts and I try a lot of them. This time I tried to make some jam butter with my mom’s homemade raspberry jam. For some reason mine didn’t come out as fluffy as I had pictured, but it sure does taste wonderful! You can find the recipe here and it really would make a great house-warming gift. Let me know if you try it! ♥r
09
Jul, 12{diy} Goat Cheese Pizza
Saturday was a much-needed rainy day here, so we decided to try this recipe that I found on Pinterest the other day. It came out so good and I highly recommend it! Basically it’s pesto, tomatoes, mushrooms and goat cheese all spread out on pizza dough… so yum! Check it out here for the full recipe and how too and let me know what you think! ♥r
05
Jul, 12Thursday Randoms
I hope you had a wonderful and safe 4th or July! Ron and I hopped around and visited friends and family and ended up back home to watch the fireworks from our backyard. We have the absolute best view with no crowds. Colorado put bans on personal fireworks this year and canceled a lot of the city fireworks due to the fires we’ve had recently. So, we were lucky to still have our city’s display.
I’ve also been busy prepping for the Summer Horseshoe Market, as well as working on a few {diy} projects that I’ll be sharing soon. Oh! Don’t forget that there is FREE SHIPPING on all Roblin Tees now through July 14th! Then this Sunday I’ll be sharing my newest weekly feature, {sunday best}, where I’ll share my Sunday Best Outfit with you. I’m very excited about this new feature for many reasons; one of the biggest being because you requested to see more of my outfits, and this is what I came up with!
I had better get back to work, but stay cool and remember not to leave your pets in a hot car, as inside temperatures can reach deadly numbers!!! If you see someone doing so, call the police and tell them right away. ♥r
08
Jun, 12{diy} scrappy hangers
If you have a hubby like mine who works in the finance world, then you know a thing or two about dry cleaning and all that comes with it. The wire hangers are out of control! They’re great to bring his crisp clothes home, but once they get there, they just end up in a big box and forgotten.
The sad part is that you can’t recycle wire hangers and you shouldn’t throw them away, because they don’t break down and they pose a threat to local wildlife. So, there are two things you can do with them… either use them at home, or return them to your dry cleaners for them to reuse. My problem is that I don’t like uncoated wire hangers, because they can leave rust marks on your clothes, and I never remember to take them back to the dry cleaners. Sheesh!
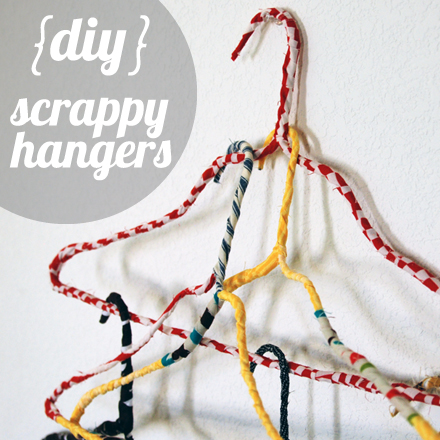
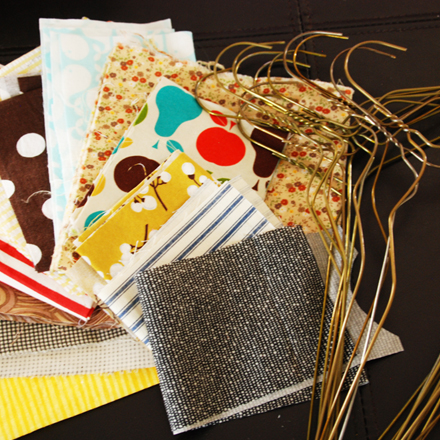
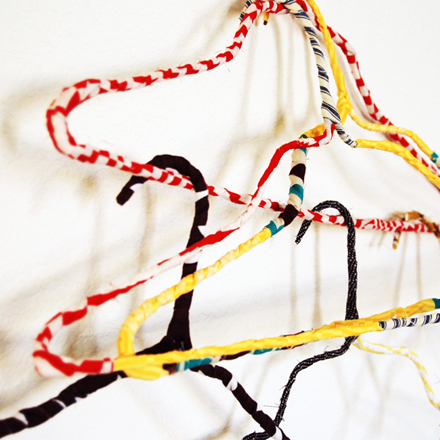
Well, the other day I realized that we didn’t have enough hangers in the house! How could this be?! We actually haven’t been shopping in a while. I saw the box of dreadful, uncoated, hangers and thought, “I sure wish I knew how to crochet around the hangers like grandma used to.” Then the light bulb… why don’t I use all of those fabric scraps and wrap them?!?! To my amazement, they came out scrappy and lovely, so I thought I’d share just how easy it was with just a few supplies.
• Wire hangers
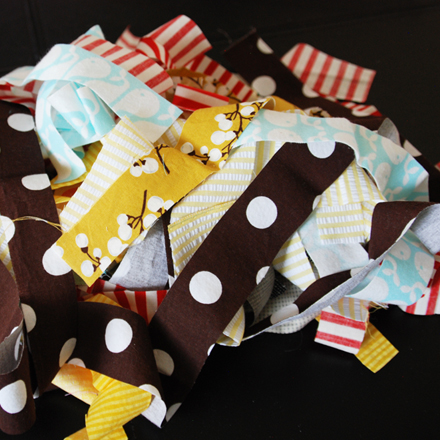
• Fabric scraps (cut about 1 in wide and however long you want)
• Scissors
• Hot Glue gun and glue sticks
Once you have all of your supplies, simply cut your scraps into roughly 1 inch thick strips. You can use your rotor blade and cut mat to cut them evenly, but I cut mine by hand. I didn’t see a need for them to be perfectly straight and it adds character.
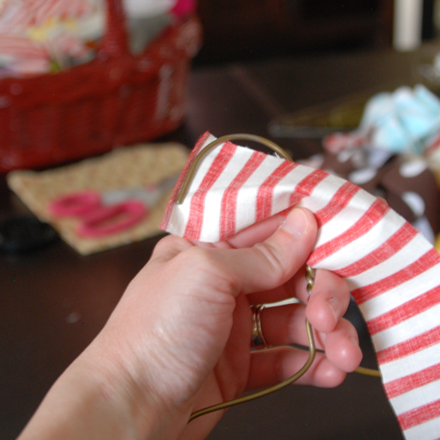
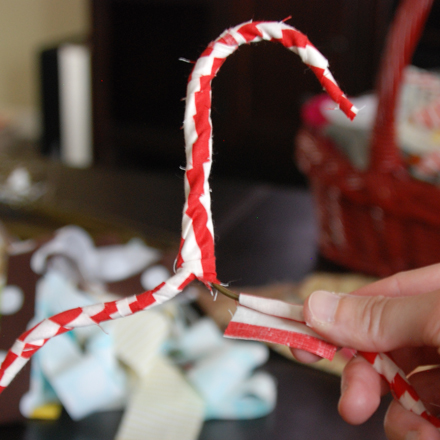
Then place a strip of hot glue along the tip of the hook and attach the end of your first strip of fabric.
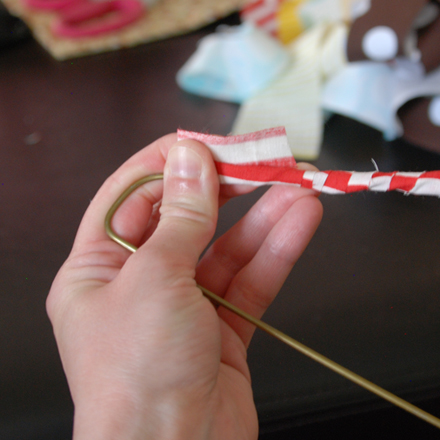
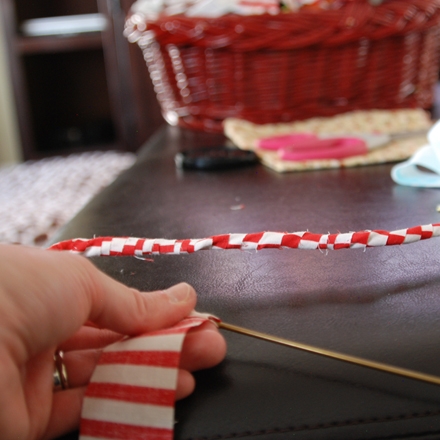
Then you begin to wrap the fabric around the hanger, applying glue every 5-7 inches. Keep the fabric tight, but not too tight.
Secure the tail end with some glue and you’re done!
Some of my scraps were shorter than others, so I just added then on where the last one left off and so on. Then, if I didn’t have enough of one pattern to complete a full hanger, I just mixed and matched! I found that the smaller your print or pattern, the better they look.
Bonus: The fabric is great for your little strappy dresses and tanks that never stay on the smooth hangers (the ones without the hooks, anyway). So, not only are you reusing and saving the environment, you get to pretty up your closet with very functional style!
I hope you get a chance to try this, and if you do, let me know how it all turns out! ♥rl

