16
Oct, 12{diy} chalkboard name tags
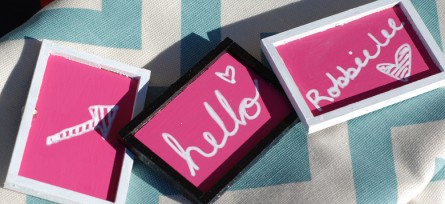
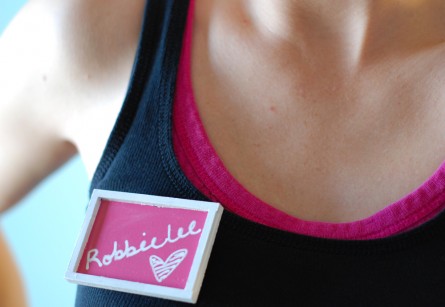
True story, I woke up the other morning, bright and early, with this DIY on my mind. Wild, huh?! I’m not sure if I dreamt it, or if I thought of it as I was waking up, but I immediately wrote it in my ideabook so that I could share it with you. And boy am I excited to share!
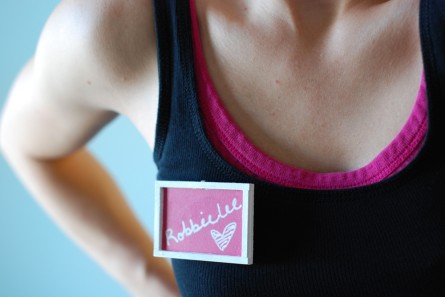
I don’t use them a ton, but I find the need for a name tag once in a while. I don’t think that it would hurt to have a name tag while I work the craft shows. My mom and I do a few a year, so these might come in really handy. And, if not, then I wouldn’t really need a good reason to wear such a cute name tag anyway… ha!
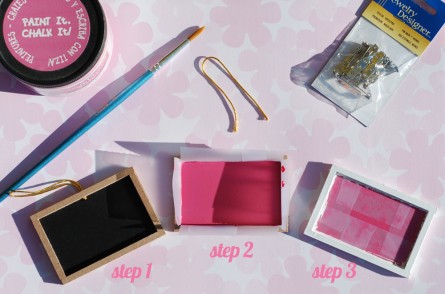
For this project you will need the following supplies:
Mini Chalkboards | These can be found at your local craft store, such as JoAnn’s.
Colored Chalkboard Paint | I chose pink, but you can choose another color or to keep it black.
Brooch Pins | These can be found at your local craft store in the jewelry section.
Acrylic Paint | This is optional. I wanted to paint the wooden frame.
Hot Glue Gun + Glue
Chalkboard Marker or Chalk
Paint Brush
First you cut off the little string that comes attached to the mini chalkboard and tape off the frame so that you can paint the chalkboard. Once that’s completely dry, tape off the chalkboard and paint your frame. Then set aside to dry. (It may take more than one coat of chalkboard paint for full coverage. I let mine dry for an hour between each coat.)
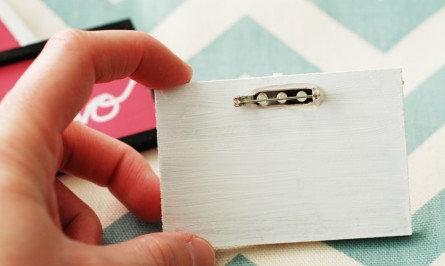
Next, hot glue the brooch pin on the back of the mini chalkboard, near the top-center. This will ensure that your name tag doesn’t tip forward and hang down. You want all to read it after all.
Lastly, write your beautiful name on it and call it done!
My favorite part of this {diy} is that its reusable and eco-friendly!!! Enjoy!

